


 |
Installation |  |
 |
FAQ's | |
 |
Trade Customers |
How to Touch-up Your Fireplace
Watch the Video Below or Read the Transcript to Learn How to Touch Up Your Fireplace.
During winter, it is normal for your heater to be used heavily and incur some wear and tear. If your heater is looking a little worse for wear after the season, it is easy to touch-up and make your unit look as good as new.
Most heaters are painted with good quality, fast drying high temperature paint which can reach temperatures of 650oC. This video will walk you through the steps on getting your heater back to looking brand new.
Required Materials
You will need the following to touch-up your fireplace:
Some high temperature spray paint, which can be purchased in store or online from Mr Stoves
3-4 sheets of 280 grit sandpaper
One clean, dry cloth
Cardboard to minimise paint settling on other surfaces
Step 1: The First Sand
Firstly you will need to sand down the effected area with a 280 grit piece of sandpaper. This will roughen the surface to allow the paint to adhere. The effected area will require a deeper sand to buff out the marks; however, the rest of the surface only needs a light sand.
Step 2: Wiping Down Your Unit
Once the surface has been sanded thoroughly, wipe down with a dry cloth to remove any paint dust. Residual particles left on the unit will affect the application of the paint.
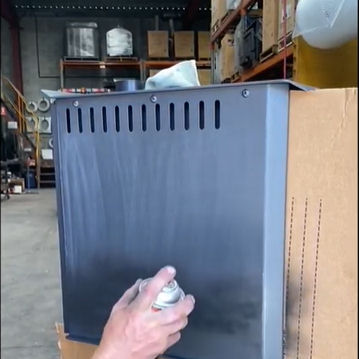
Step 3: Applying the First Coat of Paint
Before applying the paint it is important to shake the can vigorously for 1-2 minutes. To apply the first two coats of paint over the effected site use a light coat, demonstrated by the first three applications here. The fourth application is what will be used on the final coat of the unit.
To apply the dust coat move the can faster over the unit and slightly further away from the surface.
Once the first coat has been applied allow 5-10 minutes for drying. This will prevent the paint blistering when the initial burn has been established.
After 5 minutes apply a second dust coat and allow time to dry.
Once the paint has dried, lightly sand down the surface to prepare for the final coat of paint. Wipe down the surface again with a dry cloth. Ensure it is clean and free from any residue.
Step 4: Applying the Final Coat of Paint
To apply the final coat, you will need to work slower and slightly closer to the surface of the unit. You are looking for a solid, strong even finish. You should begin by working from left to right in a horizontal motion. Once you have completed this coat work from top to bottom in a vertical motion using the same technique.
After the two coats of paint have been applied allow the paint to dry. When you are ready to burn in your fireplace refer to our video demonstrating How to Burn in Your New Heater, to avoid blistering your freshly applied paint.
If you have any further questions or concerns please feel free to give us a call on 3375 1464.
Most heaters are painted with good quality, fast drying high temperature paint which can reach temperatures of 650oC. This video will walk you through the steps on getting your heater back to looking brand new.
Required Materials
You will need the following to touch-up your fireplace:
Step 1: The First Sand
Firstly you will need to sand down the effected area with a 280 grit piece of sandpaper. This will roughen the surface to allow the paint to adhere. The effected area will require a deeper sand to buff out the marks; however, the rest of the surface only needs a light sand.
Step 2: Wiping Down Your Unit
Once the surface has been sanded thoroughly, wipe down with a dry cloth to remove any paint dust. Residual particles left on the unit will affect the application of the paint.
Step 3: Applying the First Coat of Paint
Before applying the paint it is important to shake the can vigorously for 1-2 minutes. To apply the first two coats of paint over the effected site use a light coat, demonstrated by the first three applications here. The fourth application is what will be used on the final coat of the unit.
Step 4: Applying the Final Coat of Paint
To apply the final coat, you will need to work slower and slightly closer to the surface of the unit. You are looking for a solid, strong even finish. You should begin by working from left to right in a horizontal motion. Once you have completed this coat work from top to bottom in a vertical motion using the same technique.
After the two coats of paint have been applied allow the paint to dry. When you are ready to burn in your fireplace refer to our video demonstrating How to Burn in Your New Heater, to avoid blistering your freshly applied paint.
If you have any further questions or concerns please feel free to give us a call on 3375 1464.